Saturday, November 26, 2011

Cakes in Jars

Phaedra posted a question asking about cakes in Jars:

"Cakes in jars... What can u tell us? I looked into them a few months ago but wasnt sure if theyre safe?"

I won't post recipes at this stage, but I did respond with the following answer to her enquiry & thought I should share the information here also for future reference for people :)

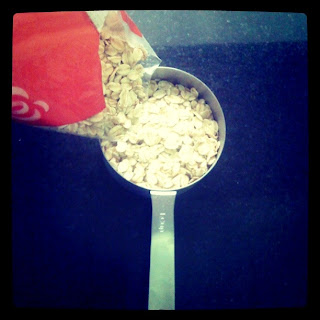
Cakes in jars are very safe so long as you make them in a hygienic fashion & with a decent quality jar. All the usual obvious things apply such as washing your hands well,giving the inside of the jar a good clean & air drying it overnight before loading it with ingredients, etc. I have done the dry ingredients ones many times over the years & actually did some as part of an unofficial RS activity a few years ago too.

They can essentially be done with any recipe that is one where you just dump all dry ingredients together, then add wet ingredients. It rules out your more involved cakes that have extra steps, but really... if being given a cake in a jar, quick to make & still fabulous tasting is better right?

There are also variations for doing cookies in jars (chic chip can be great for this) and also bread in jars. The same method applies to each of them.

As for cupcakes in jars such as Geo was describing - ones that are baked in jars, they are so quick & easy & fun to do. Any cake recipe that makes great cupcakes will work. Baby food jars or very small jars are brilliant for this.

Instead of using a cupcake/muffin tin, line your pre-washed & dried jars on a baking tray. Half fill them with cake mix & bake as per usual. They should rise to 2/3 of the way up the jar while baking. Once the cupcakes are baked, let them cool on the counter as you normally would, just keeping in mind it will take longer than normal because the jars have to cool also.

Once they are cooled, frost as per usual, but keeping the frosting below the edge of the jar. Then place the lid on top, tie with a gorgeous ribbon with a spoon attached & voila... one gorgeous cupcake in a jar ready to eat!

Tuesday, November 22, 2011

Oatmeal Relief

In light of having dealt with the shingles right now, I thought I'd share with you this very basic recipe for an oatmeal replacement for spending your hard earned cash on Calamine Lotion, Aveeno, etc. This is extremely quick & easy to make, costs next to nothing & is well worth the few minutes it takes to prepare.


You can use the oatmeal in two ways. You can make it into a (slightly coarse) paste and dab it onto the spots as you would with calamine lotion, or you can mix it into tepid bath water & soak for a soothing bath. A great option for adults & children alike... for soothing not just shingles (chicken pox). It is also great for excema, bug bites, dry skin, rashes or almost any kind of itchy skin discomfort.

Ok... on to the recipe!

To start with you'll need, either a blender, food processor or coffee grinder. You could grind the oats down with a mortar & pestle, it would just take much longer & you wouldn't have as fine a powder. It does not matter which brand of oats you use... as you can see, I'm using homebrand quick oats. I find they're just as good as the more expensive brands & they save me money which is an added bonus.


Add approx 4 cups of oats to your blender (or food processor, coffee grinder or whatever you are using. I will continue to say blender as that is what I am using, so feel free to mentally substitute your favourite grinding appliance wherever I say it)


Take note... PUT THE LID ON TIGHTLY!!! Unless you have a great desire to re-decorate your kitchen with oatmeal dust... a lid on the blender is essential. *Trust me* :)


Turn the blender onto medium & let it grind away for a few minutes. I have seen this done on high, but I find the powder moves to be ground less freely on high. Medium works better. As it grinds you will quickly see the consistency change from oat flakes to a fine powder.

Don't turn the blender off too soon or your powder will have chunks of oats in it like this & not work as well.


As the powder becomes more fine, it will tend to stick to the sides of the blender a bit (but still less than if you used your blender on high) and not move as readily. Take the wooden spoon (or spatula or whatever you prefer to use as a scraping device) and scrap down the sides of the blender.


This is what mine looks like right now... it's not fine enough yet. It needs a few more minutes in the bender.


Ahh..... much better. I don't know if you can tell the consistency change, but it is a much finer powder now. Close to the consistency of wholemeal flour.


To test the consistency, take one of your bowls and half fill it with warm water. Drop a tablespoon of your oatmeal powder into the water & swirl it around. If it dissolves into the water turning it a milky colour, it's fine enough. If it doesn't... grind it up some more. There will be tiny bits of oat floating in the water even after it is ground, but that's ok.


Store your colloidal oats in an airtight container.


Your oatmeal is now ready to add to a bathtub of warm water (Not hot as that will irritate the skin) for a nice soothing soak to relieve the itches.

If you don't want to use the bath to soak, or are on drought related water restrictions, another option is to turn your powder into a thin paste.

I want to keep some of the powder for the bath, so I am only adding one cup of oat powder to the blender & combining it with 1 cup of tepid water to make the "lotion".


Giving the mix a whizz it in the blender enables you mix it more evenly. The finished lotion is still slightly lumpy. If you wish to get rid of the lumps, strain it through a piece of cheesecloth to remove the lumps. As with calorie lotion, it dries on your skin slightly crusty, but can be rinsed off later with water.


A note for if you live in Oz... The Coles brand Salsa jars are the perfect size for holding this amount of lotion. Not to mention the fact they are such a cute shape! There's so much that can be done using jars of Coles salsa... but that's another post :)


Monday, November 21, 2011

Tub Scrub

Here is the very first Self Reliance Made Easy Recipe, courtesy of Martha Stewart.

She simply calls it tub scrub. It takes seconds to make and is non toxic and very very cost effective.

You will need.
A clean jar with lid.
1 cup of bicarb soda
1 teaspoon (or two or three squirts) of liquid soap
enough water to mix to a paste (I used 1/3 of a cup)
a few drops of an antibacterial essential oil such as eucalyptus, tea tree, lavender, rosemary etc (I used eucalyptus and lavender)

mix it all together in your jar until it forms a smooth paste and that's it. You are ready to get scrubbing the bathroom, the kitchen or even water it down some more and use it to scrub (gently) stains out of clothes, then let it soak and wash as normal.

Crusading against the throw away society